arucoモジュール で向きを正す
arucoモジュール で向きを正してみます。
本当はARとか、もっと高度なことをするためのライブラリ何でしょうけど、射影変換しやすそうなので、やってみました。
円の検出だとかは、円に似ているものを検出してしまうので、どうしても精度が落ちやすいのですが、このライブらいで生成されるマーカーは誤検出されにくそうです。
#!/usr/bin/env python
# -*- coding: utf-8 -*
import cv2
import numpy as np

aruco = cv2.aruco
dictionary = aruco.getPredefinedDictionary(aruco.DICT_4X4_50)

filename = 'DSC_3069.jpg'
#filename = 'DSC_3070.jpg'
img = cv2.imread(filename)
height, width, depth    = img.shape
div_n = 2
img = cv2.resize(img, (width/div_n, height/div_n))
height, width, depth    = img.shape

cv2.imwrite(filename+'.resize.png', img)

corners, ids, rejectedImgPoints = aruco.detectMarkers(img, dictionary)
print corners
print ids
#print rejectedImgPoints

# 配列を初期化
sPoints = [ [0]*2 ] * 4

for i, corner in enumerate( corners ):
    points = corner[0].astype(np.int32)
    cv2.polylines(img, [points], True, (0,255,0), 2)
    cv2.putText(img, str(ids[i][0]), tuple(points[0]), cv2.FONT_HERSHEY_PLAIN, 2,(0,0,255), 2)
    # 射影変換のために、1,0,2,3の順番に直す
    if ids[i][0] == 0:
        sPoints[1] = points[0]
    if ids[i][0] == 1:
        sPoints[0] = points[0]
    if ids[i][0] == 2:
        sPoints[2] = points[0]
    if ids[i][0] == 3:
        sPoints[3] = points[0]
print sPoints

cv2.imshow('drawDetectedMarkers', img)
cv2.imwrite(filename+'drawDetectedMarkers.png', img)

# 射影変換
# 右上、左上、左下、右下
rect = np.array([
    [940,100],
    [100,100],
    [100,1290],
    [940,1290],
])

pts1 = np.float32(sPoints)
pts2 = np.float32(rect)
print(pts1)
print(pts2)
M = cv2.getPerspectiveTransform(pts1,pts2)
img = cv2.warpPerspective(img,M,(width, height))
cv2.imshow('getPerspectiveTransform', img)
cv2.imwrite(filename+'getPerspectiveTransform.png', img)

cv2.waitKey(0)
cv2.destroyAllWindows()


arucoモジュール を試す
arucoモジュールを試してみます。
インストール
手元のwindowsマシンに入れた場合。
pip install opencv-contrib-python
Linuxマシンに入れる際に、pipから opencv-python と opencv-contrib-python を入れたのですが、arucoは無いというエラーが出たため、opencv-python と opencv-contrib-python をソースからコンパイルしました。
動作確認
import cv2
aruco = cv2.aruco
dir(aruco)
マーカー画像作成
4マスx4マスで、一辺が64ピクセルの画像。
0 ~ 40 の 50種類まで出来るのかな?
#!/usr/bin/env python
# -*- coding: utf-8 -*
import cv2
aruco = cv2.aruco
dir(aruco)

dictionary = aruco.getPredefinedDictionary(aruco.DICT_4X4_50)

marker = aruco.drawMarker(dictionary, 0, 64)
cv2.imshow('0.64', marker)
cv2.imwrite('0.64.png', marker)

marker = aruco.drawMarker(dictionary, 1, 64)
cv2.imshow('1.64', marker)
cv2.imwrite('1.64.png', marker)

marker = aruco.drawMarker(dictionary, 2, 64)
cv2.imshow('2.64', marker)
cv2.imwrite('2.64.png', marker)

marker = aruco.drawMarker(dictionary, 3, 64)
cv2.imshow('3.64', marker)
cv2.imwrite('3.64.png', marker)

marker = aruco.drawMarker(dictionary, 4, 64)
cv2.imshow('4.64', marker)
cv2.imwrite('4.64.png', marker)

cv2.waitKey(0)
cv2.destroyAllWindows()


マーカーの検出
検出後に、印を書き込んでいます。
cv2.drawDetectedMarkers を使えば、3シュルのデータを一発で書き込んでくれますが、どんなデータが帰ってきているのかを把握するために、1つずつ書いてみました。
#!/usr/bin/env python
# -*- coding: utf-8 -*
import cv2
import numpy as np

aruco = cv2.aruco
dictionary = aruco.getPredefinedDictionary(aruco.DICT_4X4_50)

#img = cv2.imread('100.jpg')
#img = cv2.imread('101.jpg')
img = cv2.imread('DSC_3067.jpg')
img = cv2.resize(img, None, fx=0.5, fy=0.5)
cv2.imwrite('resize.png', img)

corners, ids, rejectedImgPoints = aruco.detectMarkers(img, dictionary)
print corners
print ids
#print rejectedImgPoints

#aruco.drawDetectedMarkers(img, corners, ids, (0,255,0))

for i, corner in enumerate( corners ):
    points = corner[0].astype(np.int32)
    cv2.polylines(img, [points], True, (0,255,255))
    print type(points[0])
    cv2.putText(img, str(ids[i][0]), tuple(points[0]), cv2.FONT_HERSHEY_PLAIN, 1,(0,0,0), 1)

cv2.imshow('drawDetectedMarkers', img)
cv2.imwrite('drawDetectedMarkers.png', img)


cv2.waitKey(0)
cv2.destroyAllWindows()
これが

こうなる

opencv で マーカー付き用紙の向きを直してみる
マーカーの検出を利用して、向きを直してみます。
カメラの歪み補正等(キャリブレーション)には踏み込みません。
四隅に黒い円のマーカーを付けた用紙です。

この傾きを補正しようと思います。
流れは
マーカー検出
座標の並び替え
射影変換
#!/usr/bin/env python
# -*- coding: utf-8 -*
import cv2
import numpy as np

"""
円検出と、射影変換
"""
def main():
    image = cv2.imread('DSC_3009.jpg')
    #cv2.imshow('original', image)

    height, width ,depth    = image.shape
    # リサイズ
    image = cv2.resize(image, (width/4, height/4))
    imageOrg    = image.copy()
    height, width ,depth    = image.shape

    # グレースケールに変換
    image = cv2.cvtColor(image, cv2.COLOR_BGR2GRAY)
    # ガウシアンフィルタ
    image = cv2.GaussianBlur(image, (5, 5), 0)
    # 二値変換
    ret, image = cv2.threshold(image,127,255,cv2.THRESH_BINARY)

    # Python: cv2.findCirclesGridDefault(image, patternSize[, centers[, flags]]) → retval, centers
    # CALIB_CB_SYMMETRIC_GRID uses symmetric pattern of circles.
    # CALIB_CB_CLUSTERING uses a special algorithm for grid detection. It is more robust to perspective distortions but much more sensitive to background clutter.
    retval, centers = cv2.findCirclesGrid(image, (2,2), flags=cv2.CALIB_CB_SYMMETRIC_GRID + cv2.CALIB_CB_CLUSTERING)
    if retval:
        print centers
        image = cv2.cvtColor(image, cv2.COLOR_GRAY2BGR)
        image = cv2.drawChessboardCorners(image, (2,2), centers, retval)

    # 射影変換のために、並び替えた配列を用意する
    points  = np.array([
        centers[0],
        centers[2],
        centers[3],
        centers[1]
    ])
    print points

    # 外接矩形
    bRect = cv2.boundingRect(points)
    print bRect
    cv2.rectangle(image, (bRect[0], bRect[1]), (bRect[0]+bRect[2], bRect[1]+bRect[3]), (255,0,0), 2)
    cv2.imshow('drawChessboardCorners', image)
    cv2.imwrite('90.drawChessboardCorners.png', image)

    # 射影変換
    # 右上、左上、左下、右下
    pts1 = np.float32(points)
    pts2 = np.float32([
        [bRect[0]+bRect[2],bRect[1]],
        [bRect[0],bRect[1]],
        [bRect[0],bRect[1]+bRect[3]],
        [bRect[0]+bRect[2],bRect[1]+bRect[3]],
    ])
    print(pts1)
    print(pts2)
    M = cv2.getPerspectiveTransform(pts1,pts2)
    imageOrg = cv2.warpPerspective(imageOrg,M,(width,height))
    cv2.imshow('getPerspectiveTransform', imageOrg)
    cv2.imwrite('90.getPerspectiveTransform.png', imageOrg)

    cv2.waitKey(0)
    cv2.destroyAllWindows()
    return 0

if __name__ == '__main__':
    try:
        main()
    except KeyboardInterrupt:
        pass
検出された円と、外接矩形

完了

opencv で カードの向きを直してみる
チュートリアルを通じて学んだことを活かして、机の上においたカードを普通に(真上ではない角度から)撮影した画像を、まっすぐに修正してみる。
なお、カードが真っ白だったので、向きが分かるように、適当に文字を上に乗せました。(カードにペンでかけばよかったかな・・・)
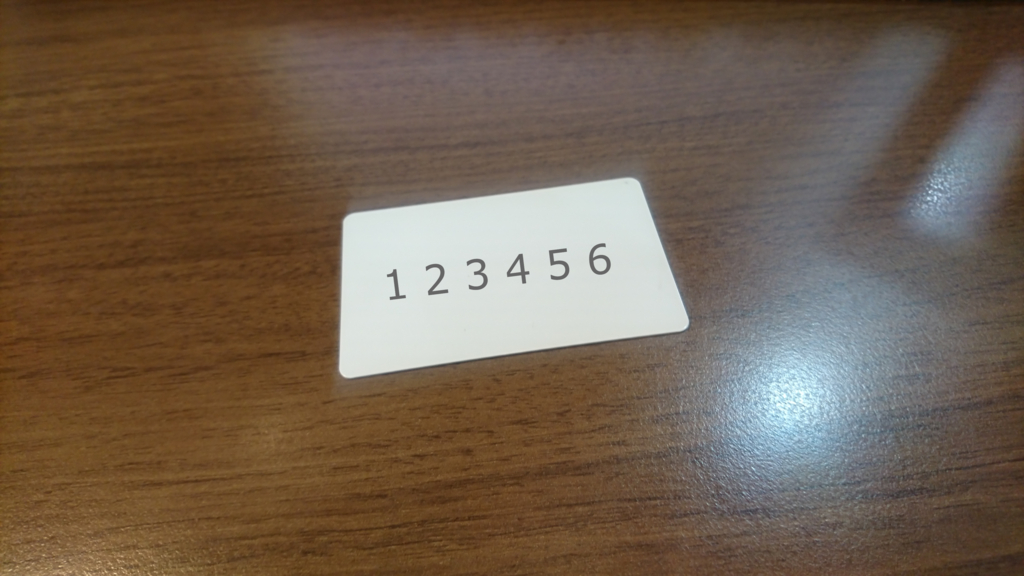
試行錯誤の結果ですが、処理の流れは、、、
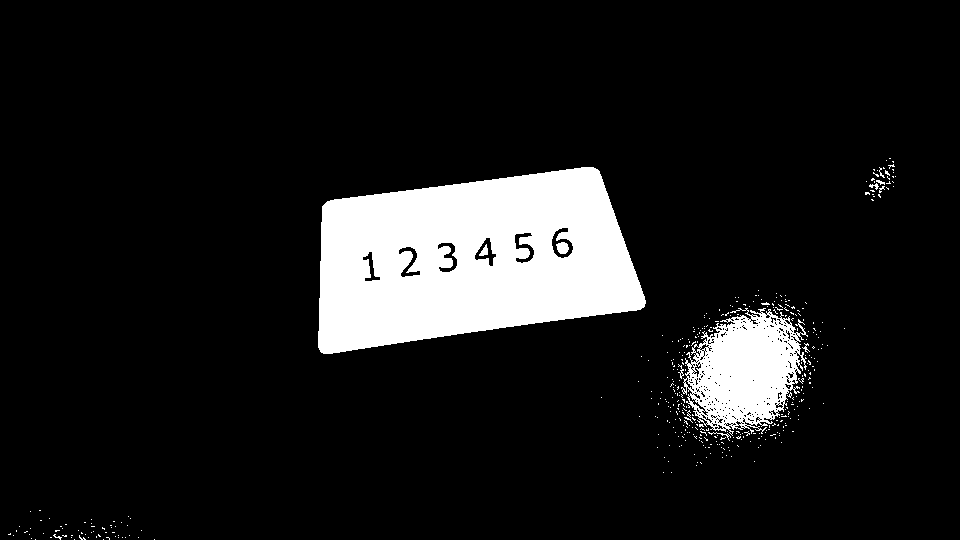
白を検出(HSVに変換します)
二値化
境界を検出する
境界を近傍する
4つ角の座標を得る
射影変換する
#!/usr/bin/env python
# -*- coding: utf-8 -*
import sys
import cv2
import numpy as np
from pprint import pprint


def main():
    image = cv2.imread('DSC_2848.2.jpg')
    #cv2.imshow('original', image)

    # リサイズ
    height, width ,depth    = image.shape
    image = cv2.resize(image, (width/4, height/4))
    imageOrg    = image
    cv2.imshow('resize', image)
    cv2.imwrite('50.resize.png', image)

    # HSVへ変換
    image = cv2.cvtColor(image, cv2.COLOR_BGR2HSV)

    # 白抽出:凄く明るい場所
    threashhold_min = np.array([0,0,180], np.uint8)
    threashhold_max = np.array([255,255,255], np.uint8)
    image = cv2.inRange(image, threashhold_min, threashhold_max)

    # BGRへ変換
    # inRange で グレースケールされている
    image = cv2.cvtColor(image, cv2.COLOR_GRAY2RGB)
    cv2.imshow('inRange', image)
    cv2.imwrite('50.inRange.png', image)

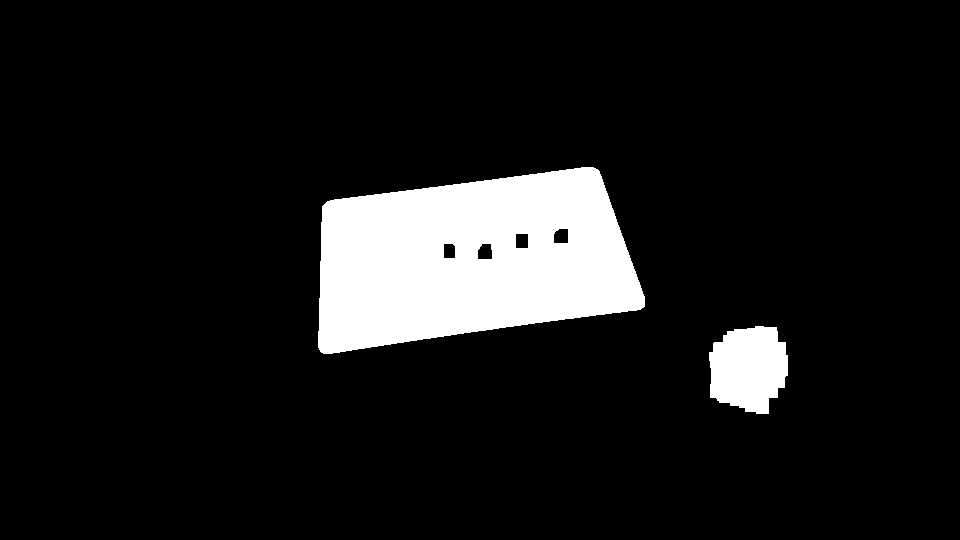
    # ノイズ除去
    kernel = np.ones((9,9), np.uint8)
    image   = cv2.morphologyEx(image, cv2.MORPH_OPEN, kernel)
    image   = cv2.morphologyEx(image, cv2.MORPH_CLOSE, kernel)
    cv2.imshow('removeNoise', image)
    cv2.imwrite('50.removeNoise.png', image)

    # 反転処理
    image   = 255 - image

    # 境界抽出
    gray_min = np.array([0], np.uint8)
    gray_max = np.array([128], np.uint8)
    threshold_gray = cv2.inRange(image, gray_min, gray_max)
    image, contours, hierarchy = cv2.findContours(threshold_gray,cv2.RETR_TREE,cv2.CHAIN_APPROX_SIMPLE)

    # 最大面積を探す
    max_area_contour=-1
    max_area    = 0
    for contour in contours:
        area=cv2.contourArea(contour)
        if(max_area<area):
            max_area=area
            max_area_contour = contour
    #print(max_area_contour)

    # カラー化
    #image = cv2.cvtColor(image, cv2.COLOR_GRAY2RGBA)

    contours    = [max_area_contour]
    cv2.drawContours(imageOrg, max_area_contour, -1, (0, 255, 0), 5)

    # 輪郭の近似
    epsilon = 0.01 * cv2.arcLength(max_area_contour,True)
    approx = cv2.approxPolyDP(max_area_contour,epsilon,True)
    #print(approx)
    if len(approx) == 4:
        cv2.drawContours(imageOrg, [approx], -1, (255, 0, 0), 3)

    cv2.imshow('findContours', imageOrg)
    cv2.imwrite('50.findContours.png', imageOrg)

    # ソートが必要かな?
    #pprint(approx)
    #approx= np.sort(approx,axis=1)
    #approx= np.sort(approx,axis=0)
    #pprint(approx)

    height, width ,depth    = imageOrg.shape

    # 射影変換
    pts1 = np.float32(approx)
    pts2 = np.float32([[600,200],[300,200],[300,350],[600,350]])
    pprint(pts1)
    pprint(pts2)
    M = cv2.getPerspectiveTransform(pts1,pts2)
    imageOrg = cv2.warpPerspective(imageOrg,M,(width,height))
    cv2.imshow('getPerspectiveTransform', imageOrg)
    cv2.imwrite('50.getPerspectiveTransform.png', imageOrg)

    cv2.waitKey(0)
    cv2.destroyAllWindows()
    return 0

if __name__ == '__main__':
    try:
        main()
    except KeyboardInterrupt:
        pass
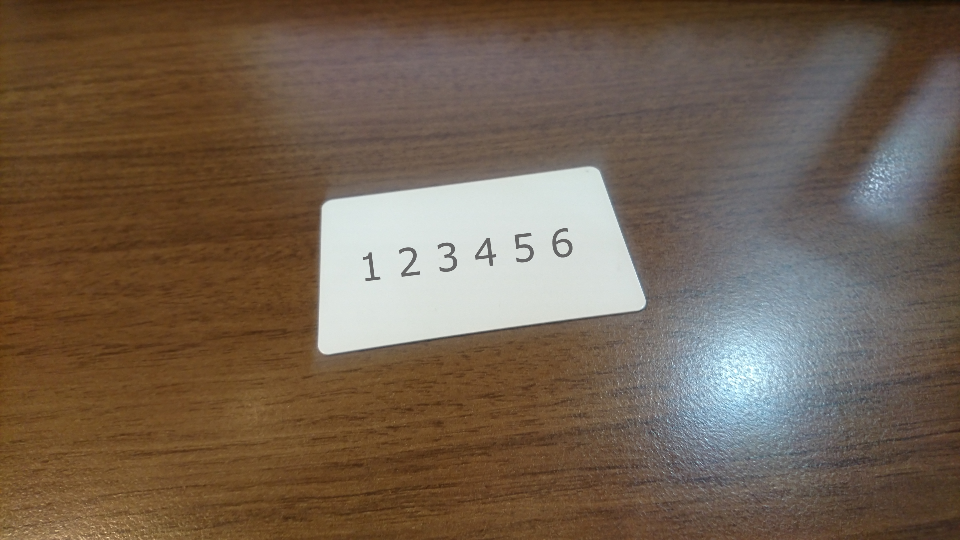
リサイズ
白を検出して二値化
ノイズ除去
境界検出

射影変換
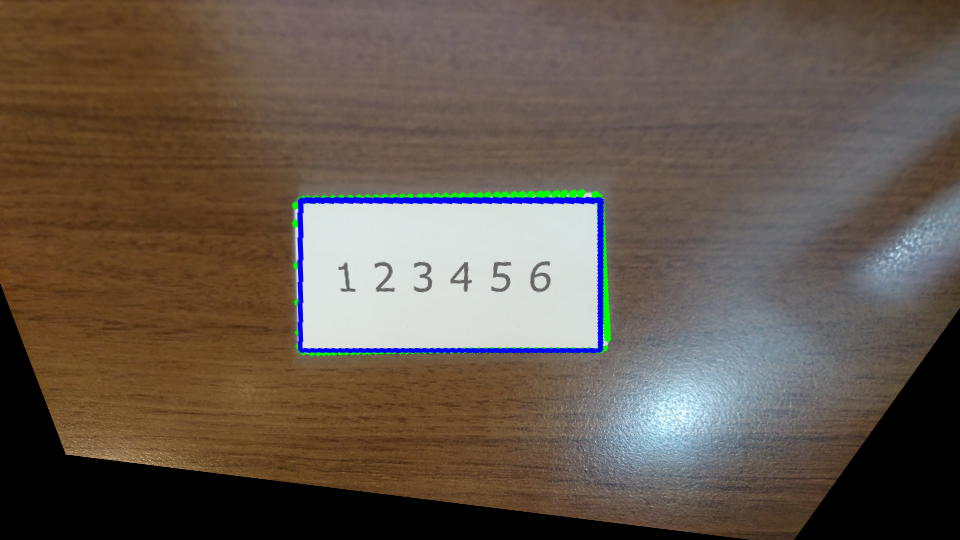
cv2.approxPolyDP で帰ってくる配列ですが、3番目の引数に True を指定したので、閉じたポリゴンを返してくれるはず。
closed – これが真の場合,近似された曲線は閉じたものになり(つまり,最初と最後の頂点が接続されます),そうでない場合は,開いた曲線になります.
ですが、並び順が固定なのか、変動するのか不明。
このプログラムでは、右上 > 左上 > 左下 > 右下 の順(右上スタートの反時計回り)でしたが、毎回そうなのか、どうなのか・・・。
opencv チュートリアルチャンレンジ 82 画像のInpainting
画像のInpainting — OpenCV-Python Tutorials 1 documentation
#!/usr/bin/env python
# -*- coding: utf-8 -*
import sys
import cv2
import numpy as np

img = cv2.imread('170519-144402.cut.jpg')
mask = cv2.imread('170519-144402.mask.jpg',0)

# INPAINT_TELEA
dst = cv2.inpaint(img, mask, 3, cv2.INPAINT_TELEA)
cv2.imshow('inpaint.INPAINT_TELEA',dst)
cv2.imwrite('inpaint.INPAINT_TELEA.png',dst)

# INPAINT_NS
dst = cv2.inpaint(img, mask, 3, cv2.INPAINT_NS)
cv2.imshow('inpaint.INPAINT_NS',dst)
cv2.imwrite('inpaint.INPAINT_NS.png',dst)

cv2.waitKey(0)
cv2.destroyAllWindows()
やってみる

マスク

処理結果 INPAINT_TELEA

処理結果 INPAINT_NS

流石に大きすぎたかな?


opencv チュートリアルチャンレンジ 81 画像のノイズ除去
画像のノイズ除去 — OpenCV-Python Tutorials 1 documentation
#!/usr/bin/env python
# -*- coding: utf-8 -*
import sys
import cv2
import numpy as np

img = cv2.imread('170523-170301.jpg')
#img = cv2.imread('170519-174830.jpg')
#img = cv2.imread('170519-144402.jpg')
#img = cv2.imread('chessboard.jpg')

cv2.imshow('goodFeaturesToTrack',img)

dst = cv2.fastNlMeansDenoisingColored(img,None,10,10,7,21)
cv2.imshow('fastNlMeansDenoisingColored',dst)
cv2.imwrite('fastNlMeansDenoisingColored.png',dst)

cv2.waitKey(0)
cv2.destroyAllWindows()
やってみる

opencv チュートリアルチャンレンジ 43 Shi-Tomasiのコーナー検出とGood Features to Track(追跡に向いた特徴)
Shi-Tomasiのコーナー検出とGood Features to Track(追跡に向いた特徴) — OpenCV-Python Tutorials 1 documentation
#!/usr/bin/env python
# -*- coding: utf-8 -*
import sys
import cv2
import numpy as np

img = cv2.imread('170523-170301.jpg')
#img = cv2.imread('170519-174830.jpg')
#img = cv2.imread('170519-144402.jpg')
#img = cv2.imread('chessboard.jpg')

gray = cv2.cvtColor(img,cv2.COLOR_BGR2GRAY)

corners = cv2.goodFeaturesToTrack(gray, 25, 0.01, 10)
corners = np.int0(corners)

for i in corners:
    x,y = i.ravel()
    cv2.circle(img, (x,y), 3, [0,0,255], -1)

cv2.imshow('goodFeaturesToTrack',img)
cv2.imwrite('goodFeaturesToTrack.png',img)

cv2.waitKey(0)
cv2.destroyAllWindows()
